How to Put Bullet Points in Google Slides (Step-by-Step Guide)
Bullet points make slides clearer and easier to scan.
They help you organize information, keep your audience engaged, and avoid the dreaded “wall of text.”
But many people struggle with bullet formatting—text alignment, custom bullets, and sub-bullets can be tricky.
This guide covers everything you need to know: how to add bullets, customize them, fix common issues, and use advanced formatting tricks.
1. How to Add Bullet Points in Google Slides
There are three easy ways to add bullet points in Google Slides.
Method 1: Using the Toolbar (Easiest Way)
- Open Google Slides and go to the slide where you want to add bullet points.
- Click inside a text box (or create one by selecting Insert > Text box).
- In the toolbar, click the Bulleted list icon (•).
- Start typing. Each time you press Enter, a new bullet appears.
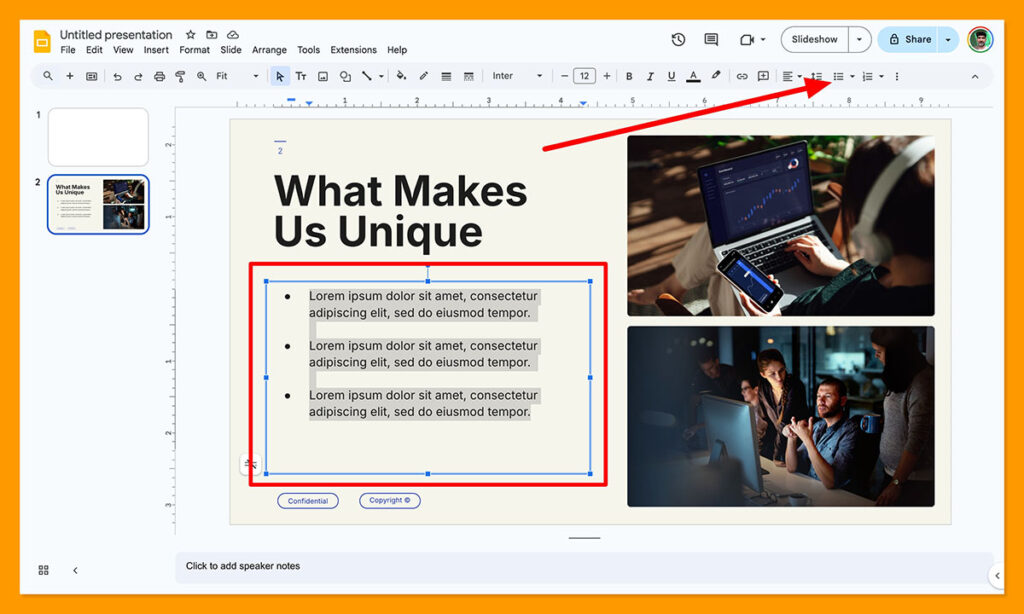
Tip: If the bullet icon is missing, click on More options (three dots) in the toolbar to reveal hidden buttons.
Most people use this method because it’s straightforward and doesn’t require remembering shortcuts. It’s also the best option if you’re working on a shared presentation and need a method that others can easily follow. Since Google Slides syncs changes in real time, anyone editing the same file will see the bullets appear immediately.
If you’re formatting multiple slides, consider copying a bullet-pointed text box and pasting it onto other slides. This keeps your formatting consistent, saving you time from adjusting bullet size and spacing manually on each new slide.
Method 2: Using Keyboard Shortcuts (Faster Option)
Want a quicker way? Use a shortcut:
- Windows/Linux:
Ctrl + Shift + 8 - Mac:
Cmd + Shift + 8
This instantly turns any text into a bulleted list.
🔹 Example:
Before shortcut:
📌 Apples
📌 Bananas
📌 Oranges
After shortcut:
- Apples
- Bananas
- Oranges
Keyboard shortcuts are a game-changer for productivity. If you’re creating slides on a tight deadline, using shortcuts can save minutes on each slide. Over time, those minutes add up, making your workflow much more efficient.
This method is also great for consistency, especially if you’re formatting long lists. By quickly applying bullets with a shortcut, you ensure your slides have a uniform structure, which improves readability for your audience.
Method 3: Converting Text to Bullet Points Automatically
Already typed a list but forgot to add bullets? No problem.
- Highlight the text.
- Click the Bulleted list icon in the toolbar.
- Google Slides formats it into bullet points instantly.
✅ Example:
❌ Before:
Apples
Bananas
Oranges
✔ After:
- Apples
- Bananas
- Oranges
This method is super useful when pasting text from another document. If you copy a list from Google Docs or an email, it often pastes as plain text. Instead of manually adding bullets one by one, just highlight the list and click the bullet button to format it instantly.
If you’re working with large amounts of text, breaking it into bullet points improves readability. Studies show that people skim presentations rather than reading full paragraphs. Using bullets makes it easier for your audience to absorb key points quickly.
2. How to Customize Bullet Points in Google Slides
Basic black dots work, but sometimes you need something more eye-catching.
Here’s how to customize bullet points to match your slide’s design.
Change Bullet Styles
Google Slides offers different bullet shapes:
- Dots (•)
- Squares (▪)
- Arrows (→)
- Dashes (—)
🔹 How to change bullet styles:
- Highlight the bulleted text.
- Click Format > Bullets & numbering > List options.
- Select a new bullet style.
💡 Tip: Use arrows (→) for action steps and squares (▪) for key points.
Choosing the right bullet style improves visual hierarchy in your slides. If you’re creating a process list, arrows make it clearer that each point leads to the next step. Meanwhile, squares work well for feature lists in business presentations, making each benefit stand out.
If you’re presenting data-heavy slides, consider mixing bullet types. For example, you can use checkmarks (✔) for completed tasks and warning signs (⚠) for risks. This subtle change makes your slides visually engaging and easy to digest.
Use Emojis or Icons as Bullet Points
Want more engaging bullets? Use emojis or custom symbols.
🔹 How to do it:
- Highlight the bulleted text.
- Click Format > Bullets & numbering > List options > More bullets.
- Search for an emoji (e.g., ✅, 🔥, 🎯) or symbol (★, ➜, ✔).
- Click it to replace the default bullet.
✅ Example:
❌ Basic list:
- Apples
- Bananas
- Oranges
✔ Upgraded list:
🍏 Apples
🍌 Bananas
🍊 Oranges
Why it works: Custom bullets make your slides look more visually appealing.
Emojis are especially useful for presentations that target younger audiences or creative industries. If you’re making a social media strategy deck, using social icons (📷 for Instagram, 🐦 for Twitter) helps reinforce your points.
Be mindful of accessibility—some emojis may not display correctly on all devices. Test your slides on different screens to make sure the custom bullets look as expected.
Adjust Bullet Size & Spacing
Bullets too big or too close together? Fix it with these settings:
- Select the bulleted text.
- Click Format > Line spacing.
- Choose Single, 1.5x, or Double spacing based on your preference.
- Adjust text size to resize bullets.
✅ Best practices:
- Use single spacing for compact slides.
- Use 1.5x spacing for better readability.
Proper spacing prevents clutter and makes your slides easier to read. If your bullet points look crammed together, increasing the spacing helps create white space, making each point stand out.
If you need more control, use manual line breaks (Shift + Enter) instead of extra bullets. This keeps related ideas in the same bullet point without adding unnecessary list items.